Summer Creamsicle Tart

This post may contain affiliate links. As an Amazon Associate and an affiliate for other programs, I earn a commission from qualifying purchases. Read the disclosure policy for more information.
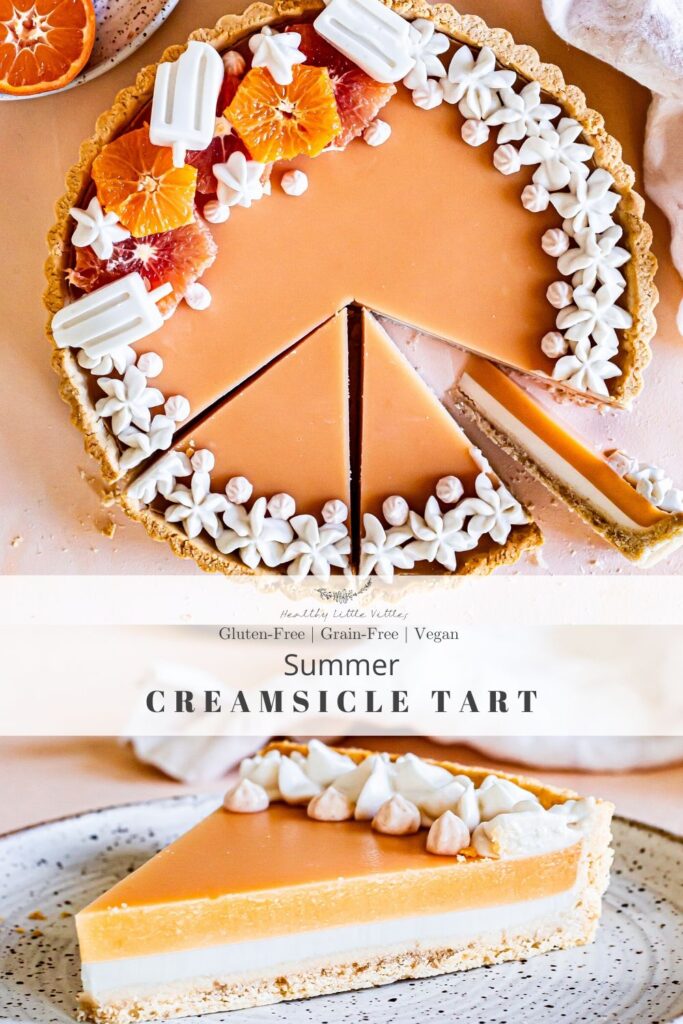
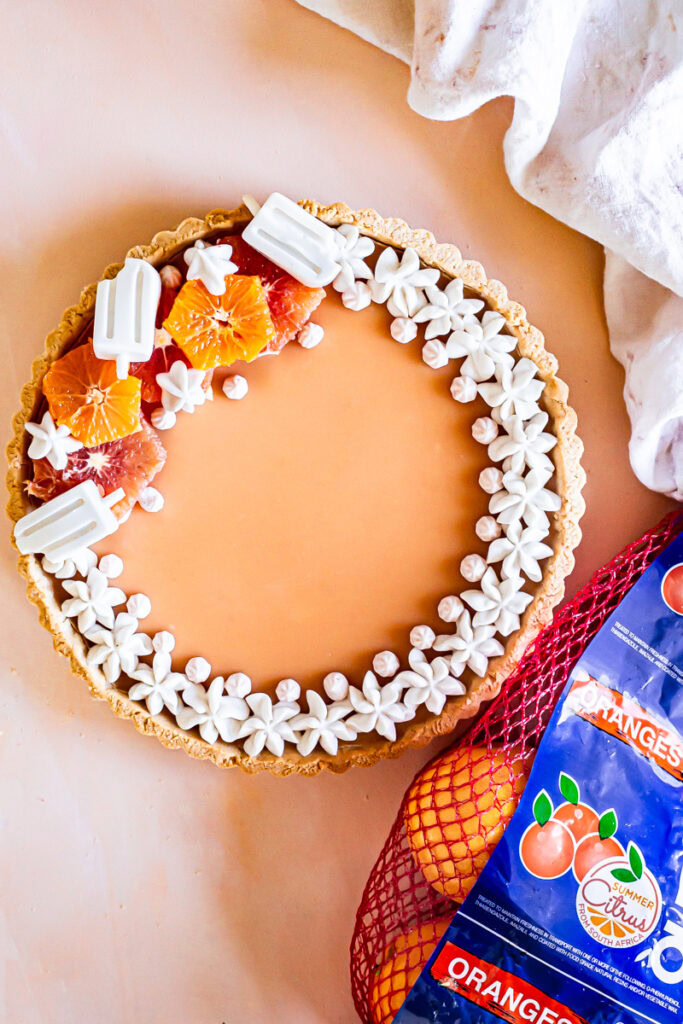
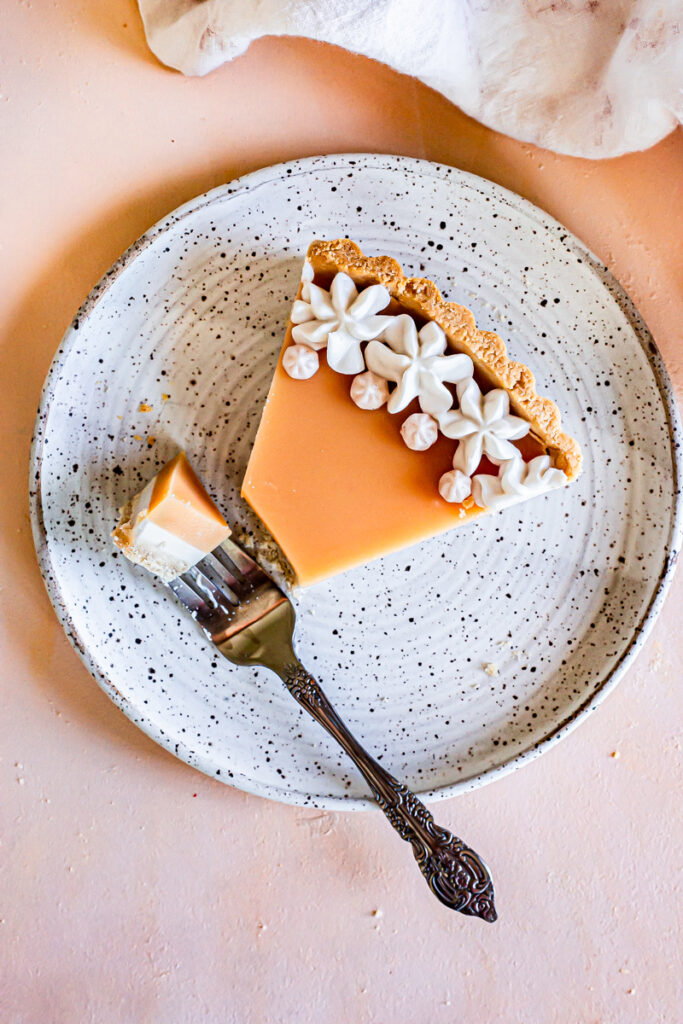
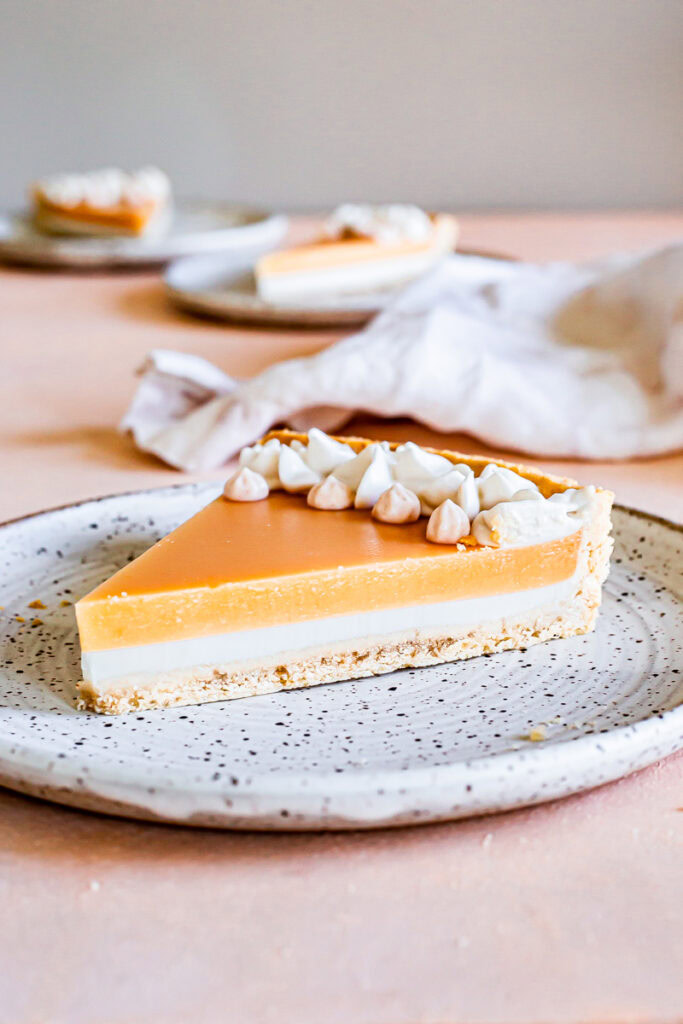
An easy summer dessert that tastes like a creamsicle popsicle! A gluten-free, grain-free shortbread crust filled with a layer of vanilla coconut cream topped with a cara orange citrus layer. Garnish with vegan, dairy-free whipped cream and fresh orange slices!

This is a sponsored post written on behalf of Summer Citrus from South Africa. The opinions and text are all mine.
If you could slice up summer and serve it on a plate, I imagine it would taste just like this Summer Creamsicle Tart. It’s light, it’s refreshing… it brings back nostalgic childhood memories of hot summer days filled with creamsicle popsicles.

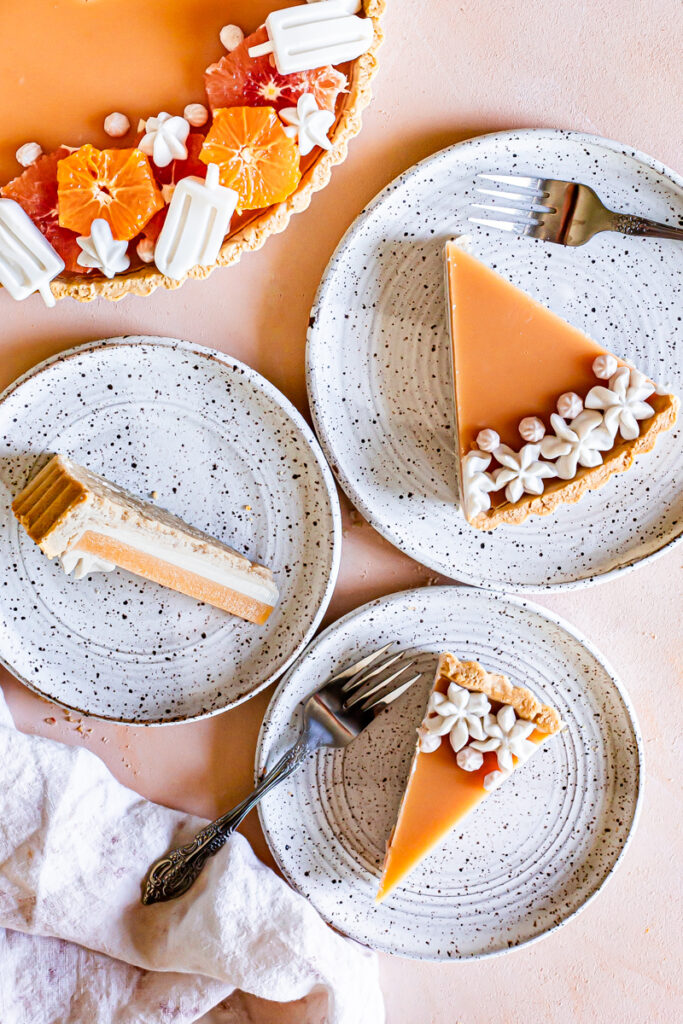
Despite how “fancy” it might look, this citrus tart might just be one of the easiest dessert recipes on my blog! Mini popsicle molded custard optional 😉

So, let’s talk about how the timeless creamsicle flavor snuck its way into my summer citrus tart. When I went to the store to buy Summer Citrus From South Africa oranges, I didn’t have the idea to do a creamsicle tart in mind. According to the poll I took in my Instagram stories, I knew that you guys wanted a citrus tart of some kind, so that’s what I set out to do. So I grabbed a bag of Summer Citrus Navel Oranges and headed home.
And the recipe development process began. All-in-all, it turned out amazing! However, the color wasn’t very creamsicle-y. I could have posted it and called it a creamsicle tart anyway, but my perfectionist self was telling me to redo it. So I headed back to the store (wearing my mask of course) and I excitedly discovered the most lush cara cara oranges from Summer Citrus From South Africa. Score!

Cara cara oranges are the perfect choice for this Summer Creamsicle Tart for a few reasons. For one, they have a pinkish tone which makes this tart the more traditional creamsicle color you might be used to. WIN. Two, my love for pastels runs deep y’all, and cara cara oranges pretty much define this soothing color palette- so it’s kind of a match made in heaven. And three, they are a bit sweeter than navel oranges, and although you can certainly use navel oranges in this tart recipe, I think the cara cara oranges only elevates this tart to a new level.

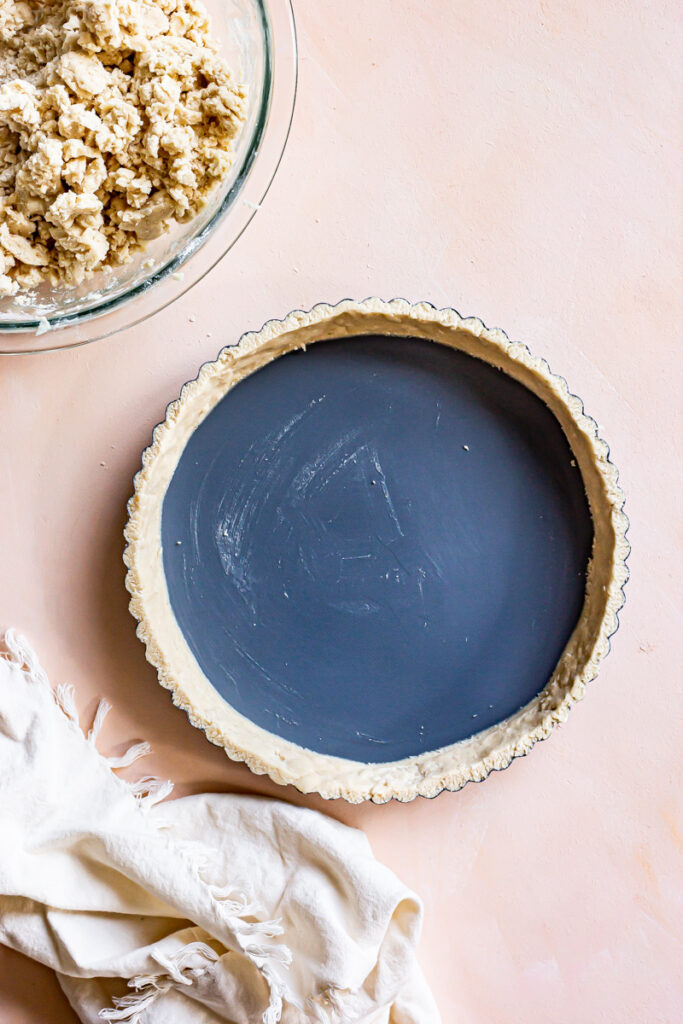
I already nailed the shortbread crust from my “Twix” Tart and Vanilla Bean Custard Tart recipes and I knew it would pair so well with the citrus, so that was a no brainer. Now, the key to making your tart crust look clean with crisp edges is to press the sides of the tart in first, and then press the bottom of the crust in the tart pan. Things I didn’t know prior to making this tart… #ameteurbakerhere Totally an ah-ha moment, and I think it makes a huge difference, so I definitely wanted to share it with you too 🙂
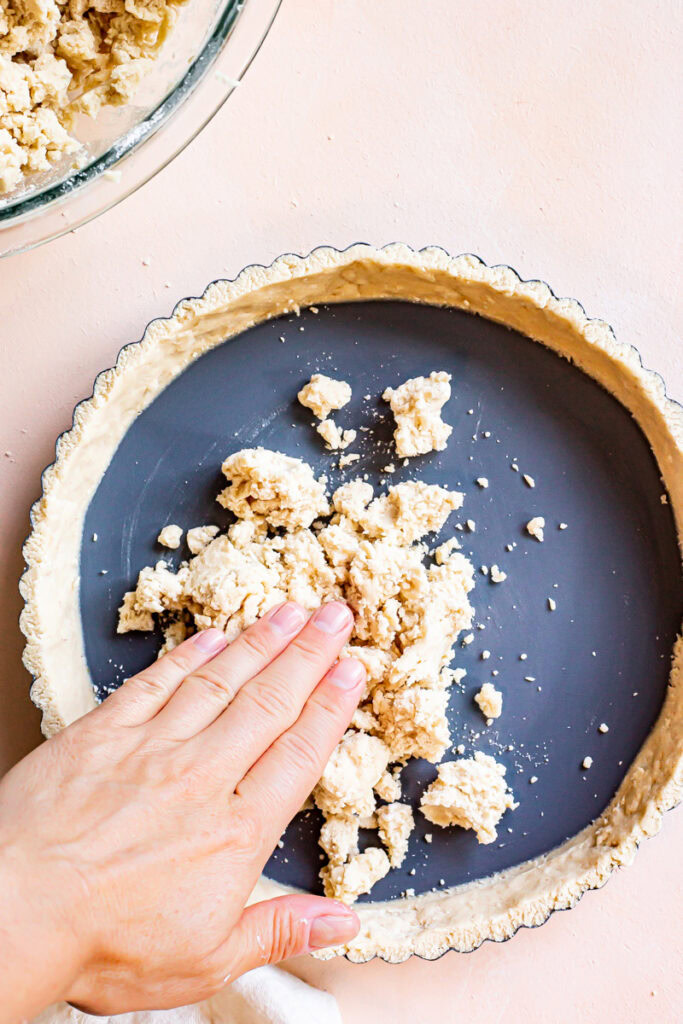
Then you’ll just want to make sure you press it down with the back of the spoon so it doesn’t all flake apart when you remove it from the tart pan, like this.

Unlike maybe more traditional creamsicle desserts, this tart is naturally sweetened from the Cara cara oranges and agave/maple syrup. It’s not so sugary that you’re searching for water after you enjoy a slice but sweet enough to satisfy your sweet tooth. It’s definitely a dessert that you can enjoy without guilt, and share with your kids knowing it’s the real thing, nothing fake here!

The filling has a panna cotta-esque texture made vegan with agar agar powder instead of gelatin. Both layers are simple to make, you simply heat the coconut milk in a saucepan over high heat with the other ingredients until it boils and pour into your crust. Then chill it for about an hour. Then you’ll repeat the process and make the cara cara orange layer.

There are few ways you can juice your oranges too. My suggestion is to peel and blend your oranges and then strain through a sieve or nut milk bag (affiliate link) or you could juice them with a handheld juicer (**note: you might get less juice this way so you may need another orange or two to get one and a half cups worth of orange juice).
The whipped cream is totally optional but I think it adds just the right finishing touch. It’s also made with coconut milk, but there is some powdered sugar in there. If you’d like, you can switch it out with some maple syrup, but I haven’t tried it that way so I don’t know if it will be pipeable. Or you could just slather the whipped cream over top too!
So next time you’re at the store, keep your eyes open for Summer Citrus From South Africa Cara Cara Oranges! I hope this Summer Creamsicle Tart tickles your tastebuds and puts a smile on your face! I’d love to see all your gorgeous tart recreations so be sure to tag me on Instagram! #HealthyLittleVittles


Summer Creamsicle Tart
- Total Time: 4 hours 45 minutes
- Yield: 6–8 people 1x
Description
An easy summer dessert that tastes like a creamsicle popsicle! A gluten-free, grain-free shortbread crust filled with a layer of vanilla coconut cream topped with a cara orange citrus layer. Garnish with vegan, dairy-free whipped cream and fresh orange slices!
Ingredients
Shortbread Crust
- 2.5 cups cassava flour
- 1 teaspoon salt
- 1 cup plant/vegan butter
- 1 teaspoon pure vanilla extract
- 1/2 cup agave/maple syrup
Coconut Cream Layer
- 1 can full fat, unsweetened coconut milk
- 1/3 cup agave/maple syrup
- 1 teaspoon agar agar powder
- pinch salt
Cara Cara Orange Layer
- 1.5 cups cara cara orange juice, about 6 cara cara oranges
- 1/2 cup agave/maple syrup
- 1 teaspoon pure almond extract
- 2 teaspoons agar agar powder
- 1/4 cup coconut cream layer (you will have leftover, use it in this layer)
Whipped Cream (optional)
- 2 cans full fat, unsweetened coconut milk
- 2 teaspoon agar agar powder + 6 tablespoons water
- 1 teaspoon pure vanilla extract
- 1/2 cup organic powdered sugar
Instructions
- Preheat your oven to 350 degrees.
- In a large bowl, whisk all the dry crust ingredients together, then add in the pure vanilla extract and agave/maple syrup.
- “Knead” in the plant-butter with your hands until your dough forms. The dough should be slightly crumbly, but should stick together between your fingers if you squeeze it. If it doesn’t, add a little water.
- Spray a 9-inch tart pan with coconut oil and then press the crust into the tart pan, starting with the outer edge, and then press the dough into the bottom of the tart pan. Smooth and press it down with the back of a spoon.
*NOTE: You may have leftover crust, which you can make cookies out of (it’s delicious!) Be sure not to fill the tart pan too much with dough, to leave room for the filling. - Bake for 20-25 minutes until the edges start to turn slightly golden. DO NOT OVERBAKE (gluten-free crust doesn’t turn the lovely golden brown to signal that it’s done, so I wouldn’t cook longer than 25 minutes.
**NOTE: you may need to press down the crust lightly after your take it out of the oven with the back of a bowl or spoon to make a deeper well for the filling. - Set the crust aside to cool while you make the coconut cream filling layer.
- In a medium saucepan, whisk together all the coconut cream layer ingredients over high heat and bring to a boil, whisking frequently. Remove from heat and allow it to cool slightly.
- Meanwhile, peel the oranges and slice in half. Add them to your blender with about 1/4 cup water. Blend on high until smooth.
- Strain the orange juice through a seive or a nut milk bag (affiliate link) to remove all the pulp. Set aside.
- Reserve 1/4 cup of the coconut cream mixture and set aside, then pour the rest of it into the tart shell.
- Carefully place the tart in your fridge for about 45 minutes, until the layer is firm to the touch.
- In a medium saucepan, heat the cara cara orange layer ingredients over high heat and bring to a boil whisking frequently. Set aside to cool slightly and then pour over top the coconut cream layer in the tart.
- Place the tart back in the fridge to chill for about 4 hours/overnight.
- Keep leftover tart stored in an airtight container in the fridge.
Whipped Cream
- Spoon the solid part of the coconut cream into your mixing bowl. Whip on high speed (either with your KitchenAid Mixer or hand mixer) until the coconut cream fluffs.
- Mix the agar agar powder with water and then add to the coconut cream along with the vanilla and powdered sugar. Beat on high again for another few minutes and then place in the fridge.
**NOTE: you can also make this the day before - Using a piping bag and tip, pipe the whipped cream over top (or just slather it on!)
- Prep Time: 20 minutes
- Additional Time: 4 hours
- Cook Time: 25 minutes
- Category: Dessert
- Cuisine: American